Top 10 Celery features
Written by Sue van Elteren
Posted on 11 Mar 2020 - 8 minutes read

Nowadays, Celery generates 400,000 pay slips every year. The software is therefore used very intensively by many companies. Not only the number of pay slips processed by Celery has increased substantially in recent years but also the number of features that we offer within the software has also been considerably expanded. In this blog we put the top 10 features in the spotlight, so that you can use Celery even more optimally.
1: Online pay slips
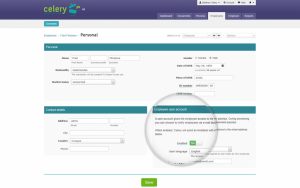
How much time do you spend on printing hardcopy pay slips and distributing the slips to employees each month? In Celery there is the option that an online employee account is created for employees in which they receive their monthly pay slips in PDF. And also the Annual Statement will be added annually to this employee account.
During the periodic processing of the payroll you set a publication date on which date the employee receives a message that the pay slip is available online. Experience shows that employees check their pay slip online for any overtime and withholding of an advance, and then close the pay slip document again.
How to activate?
You activate the employee account per employee in: Personal/Employee account:
Your advantage:
– Time savings: Printing, folding, putting in envelopes and distributing are no longer necessary!
– You contribute to a cleaner environment by no longer printing pay slips.
2: Business user accounts with “viewing rights” only
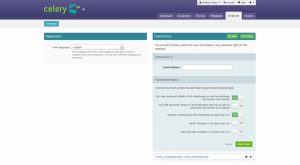
Do you want to give others access to your Celery account, but with only viewing rights, so that they cannot change anything? Then the Company User account is the right option.
In this way, administration firms (Payroll Services Providers) can easily grant access to Celery to their payroll clients and contacts. In that case confidential payroll data and documents no longer need to be sent via (unsafe) email.
Parties that use Celery for their internal payroll administration can create a Company User account for, for example, management and/or management, or persons from financial departments who need the periodic salary journal or have to pay the periodic net wages using a digital payment file that Celery creates.
How do I use this?
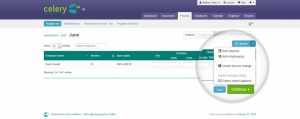
A Company User is created under Employer/change/Grant access:
Your advantage:
After registering the account, the Company User has access and can view documents and/or request reports. But this user cannot, for example, start payroll processing or change the salary and bank details of employees.
3: Digital bank payment files
Do you still enter the net wages for payment manually in your online banking? That takes a lot of time and there is a big chance of making mistakes. Celery makes it easy for you!
Celery offers the possibility to create a digital payment file for the following banking institutions. You must upload this file via online banking so that the bank can process the payments.
Aruba:
Aruban bank
Caribbean Mercantile Bank
RBC Royal Bank
Banco di Caribe
BES:
Maduro & Curiel’s Bank
RBC Royal Bank
Banco di Caribe
Curacao:
Girobank
Maduro & Curiel’s Bank
RBC Royal Bank
Banco di Caribe
Saint Martin:
Windward Island Bank
RBC Royal Bank
Banco di Caribe
Suriname:
Finabank
Hakrinbank
De Surinaamse Bank
How do I use this?
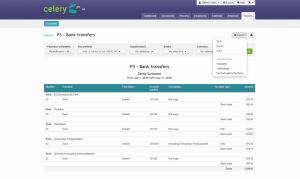
You can find this option in Reports/X3 Bank transfers/Export/Payment files:
Regarding CMB, MCB and WIB, you must have Corporate Banking. And you must request your Originator-ID code from your bank to enter in Celery when creating the payment file. At RBC, you must request the “file transfer” possibility. At all other banks it is a standard option in online banking to be able to upload digital payment files.
Your advantage:
This option can save you a lot of valuable time, and the chance of paying out incorrect amounts is impossible.
4: Export journal entries to various accounting software
How to activate?
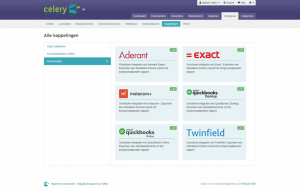
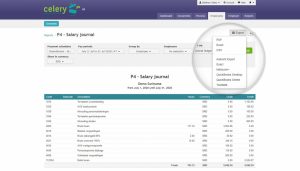
You activate the export salary journal in Employer/Integrations/Accounting. The option to generate this digital export journal entry can be found in Reports/X4 Salary journal entry/Export.
Your advantage:
Save time and prevent errors.
5: Import periodic changes
During activation you can have an Excel template import file created by Celery for your active employees and existing wage codes. And with the above option “Create your own” you can also make an existing sheet with mutations readable for Celery. Then, during processing, under the drop-down button next to “Update”, choose the “Celery import template” option and follow the steps.
This is a very quick way to import the periodic changes and after checking the totals in report X19-Change Report you can see immediately whether all transactions have been imported correctly. And the changes cannot be imported at the wrong employees since they are imported based on the unique employee number.
How to activate?
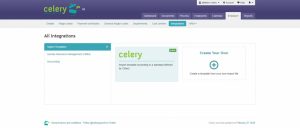
You must activate this option under Employer/Integrations/Import templates:
Your advantage:
Save time and prevent errors.
6: Wage codes on pay slip
You can set yourself in Celery whether you do want to display in the automatically generated documents by Celery – such as, for example, the pay slips – the wage codes Acquisition costs, Taxed fringe benefits and Zero value line items. Zero value line items are wage codes that are not used in the current run but were applied earlier in the year and therefore have a cumulative year-to-date balance.
How do I use this:
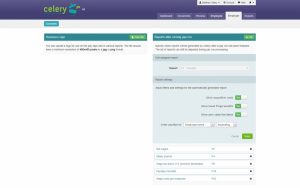
You can set this option in Employer/edit/Reports after closing pay run:
You can also set in this screen whether you want to sort this document by employee name or number. Such setting options are also included in report X18-Checklist and X4-Salary journal.
Your advantage:
A clear and comprehensive pay slip for you and your employees.
7: Automatic periodic reports
Did you know that you can set which payroll documents you want after completing your periodic run? And then a few seconds after you close the run, the documents you selected are ready in the Documents folder.
How do I use this:
You can set these “fixed reports” in Employer/edit/Reports after closing pay run.
Your advantage:
This option saves you a lot of valuable time, because generating documents manually takes a lot of time. And that is no longer necessary, everything is automated.
8: Company logo on pay slip and login page
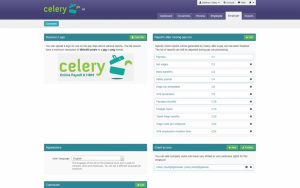
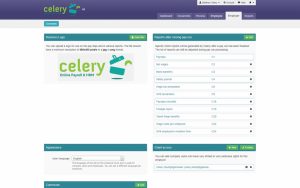
Isn’t it cool to see your own company logo on the pay slips and on the login page of your own Celery account? You can set that yourself.
How do I use this:
Logo on pay slip: Employer/edit/Business logo
Logo on login page: Account/Account Information/edit/Logo
Your advantage:
This ensures that the pay slips and login page match your company image.
9: Quick import of new employees via Import/Export
You can create a new employee in principle in Employees/Add. However, if you must create several employees, Celery offers you a faster option.
How do I use this:
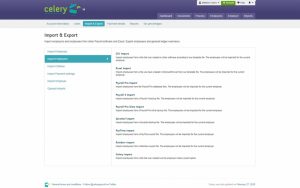
You can find this option in Account/Import & Export/Import employees:
Under the “Excel import” option you will also find a template file in Excel where you can enter the employee data and then import it. Under the above option you also see the possibility to quickly import employee data from other software packages.
Your advantage:
This can save you a lot of time, especially if you must create a lot of employees at the same time.
10: The possibility of deducting extra social premiums
Sometimes employees wish to have some extra social contributions and wage tax deducted. This is possible, for example, if you have multiple sources of income and want to prevent an assessment (after submitting the private Income Tax return).
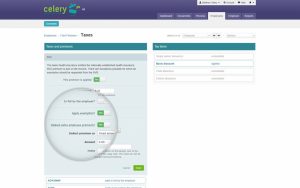
Celery offers this option. For each employee you can indicate in the relevant premium whether you want to withhold additional employee premium:
How to activate:
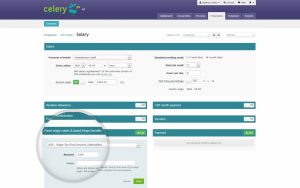
You activate the option to have extra Wage Tax withheld per employee under “Fixed wage codes & taxed fringe benefits” by activating wage code 625 – Wage tax fixed amount (deduction).
Your advantage:
A happy employee and preventing assessments.

Thousands of companies use Celery. Are you switching too?
Pricing for Celery starts at $20 per month.

